How to Host a Family STEM Night
By rmelody
06 June, 2025
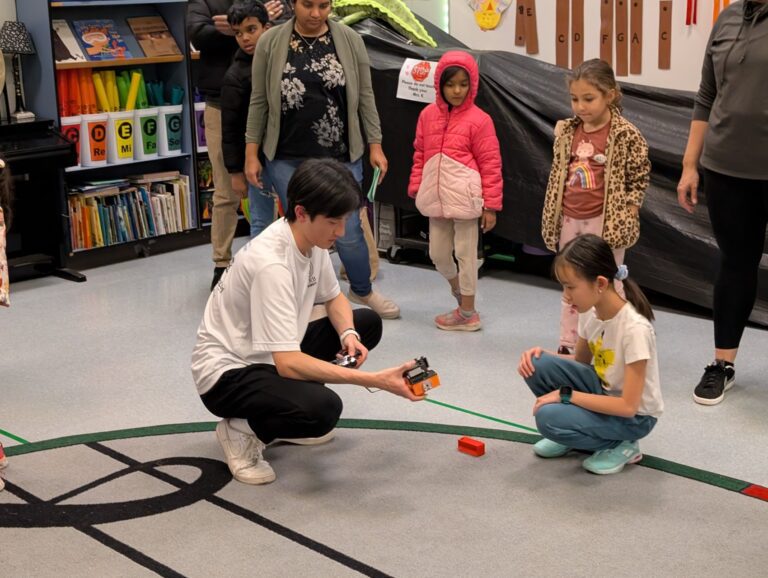

How to Host a Family STEM Night – Festival Format
Phase 1: Planning & Organization (6–8 Weeks Before the Event):
- Secure a Host Partner: Collaborate with a school, library, museum, or other community institution.
Ideally, your partner should be a STEM advocate (e.g., a principal, teacher, or librarian) who can make decisions and help coordinate logistics.
- Define Your Goals: Clarify what you want families to gain from the event. Example goals:
- Spark interest in STEM careers and exploration.
- Highlight student learning and creativity.
- Encourage STEM activities at home.
- Strengthen school–community connections.
- Set the Date, Time, and Location: Coordinate with the host’s calendar; avoid major holidays or competing events.
- Use multiple spaces creatively—gyms, classrooms, hallways, and outdoor areas (weather permitting).
- Establish a Budget: Include costs for materials, signage, printing, and refreshments.
- Consider providing lunch or dinner for volunteers, depending on the event time.
- Tip: the hosting venue or the PTA/PTO are usually helpful with this
- Seek funding or in-kind donations from:
- IEEE sections, societies, or affinity groups
- Local businesses or STEM-focused nonprofits
- Select Engaging Activities: Focus on age-appropriate, hands-on experiences using affordable, accessible materials. Sample ideas:
- Science: Volcanoes, circuits, simple reactions
- Technology: Coding games, VR, robotics
- Engineering: Paper airplanes, LEGO towers, marble runs
- Math: Tangrams, statistics, art with math
Tip: Explore resources from TryEngineering, IEEE societies, local universities, and after-school programs.
- Build Your Program with Partners: Invite organizations to run stations (and bring their own materials).
Organizations to Consider:
- Universities (e.g., University Clubs, Student Organizations, etc.)
- After-school programs (e.g., FIRST Robotics, Girls Who Code, etc.)
- Learning Centers (e.g., Mathnasium, Tutoring Centers, etc.)
- Government offices (e.g., Public Works, Fire Department, etc.)
- Community groups (e.g., Audubon Society, Beekeepers, Hobbyists)
- Local high school STEM clubs and afterschool programs
- Recruit Volunteers: Clearly define volunteer roles and expectations.
Consider:
- IEEE members Inside your Section:
- Put out a call for volunteers from your section to support the event
- Don’t Forget to invite:
- Technical Societies (e.g., ComSoc, PES, etc.)
- Affinity Groups (e.g., Women in Engineering, Young Professionals, Life Members)
- Community partners (Girl Scouts, Science Olympiad, etc.)
- Translators (where applicable)
- High school volunteers (Beta Club, NHS, JROTC)
- Tip: Partner elementary schools with their feeder high schools.
- Note: Avoid middle school volunteers for elementary-focused events.
- Plan Logistics
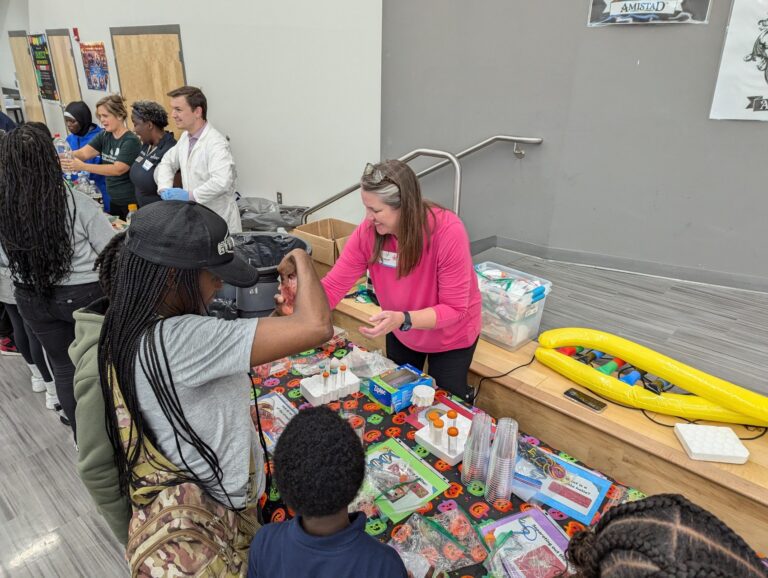
- Event Format: Festival-style with families visiting stations at their own pace.
- Host Responsibilities:
- Confirm HVAC, tables, and chairs
- Provide an estimated attendance count 2 weeks in advance
- Parking for presenters and volunteers
- Volunteer Prep:
- Remind volunteers of the date, location, and attendee count.
- Share expectations, supply requirements, and parking instructions.
- Materials:
- Create detailed supply lists for any activities where you’ll be providing materials.
- Prepare instructions and place them in plastic sheet covers; include real-world STEM connections.
- Printing:
- Prepare:
- Name badges
- Directional signs
- Station labels
- Activity guides
- Prepare:
- Additional Needs:
- Station layout map (Master Plan)
- Disposable tablecloths (for easy cleanup)
- Safety & Accessibility:
- Eliminate unsafe activities.
- Provide safety gear (goggles, gloves) as needed.
- Ensure the event is accessible for families with disabilities or language needs.
- Don’t Forget: Plan time for setup and clean-up!
Phase 2: Implementation (Event Day)
- Prepare Materials and Set Up Stations
- Pre-pack labeled bins with all needed supplies for each station.
- Include signage, tape, name badges, plastic tablecloths, and the Master Plan.
- Welcome Volunteers and Presenters
- Open check-in table for volunteer arrival.
- Distribute name badges and station assignments.
- Assign additional support volunteers as floaters or greeters.
- Run the Event
- Open the doors and welcome families!
- Ensure all stations are staffed and supported.
- Float around to monitor stations and assist as needed.
- Capture the Moments
- Take photos and videos (with permission) for future promotion, reporting, and sharing with families.
Phase 3: Follow-Up (After the Event)
- Gather Feedback
- Use quick paper or digital surveys for families, volunteers, and presenters.
- Ask what worked well, what could be improved, and suggestions for next time.
- Send Thank-Yous
- Acknowledge all who contributed—volunteers, presenters, staff, and sponsors.
- Share the Highlights
- Post photos and a short recap on the school website, social media, or in newsletters.
- Reflect and Improve
- Review feedback and identify changes for next time.
- Update your templates and supply lists for easier planning next year.
Tips for Success
- Keep it Hands-On: Kids learn best by doing.
- Make it Fun: Focus on exploration, not perfection.
- Offer Variety: Include activities for all ages and interests.
- Start Small: A few well-run stations are better than too many chaotic ones.
- Engage Families: Design activities parents and children can do together.
- Connect to Curriculum: Reinforce what students are learning in school.
- Empower Older Students: They make excellent role models and leaders.
- Leverage Community Partners: Many local groups want to help—just ask!